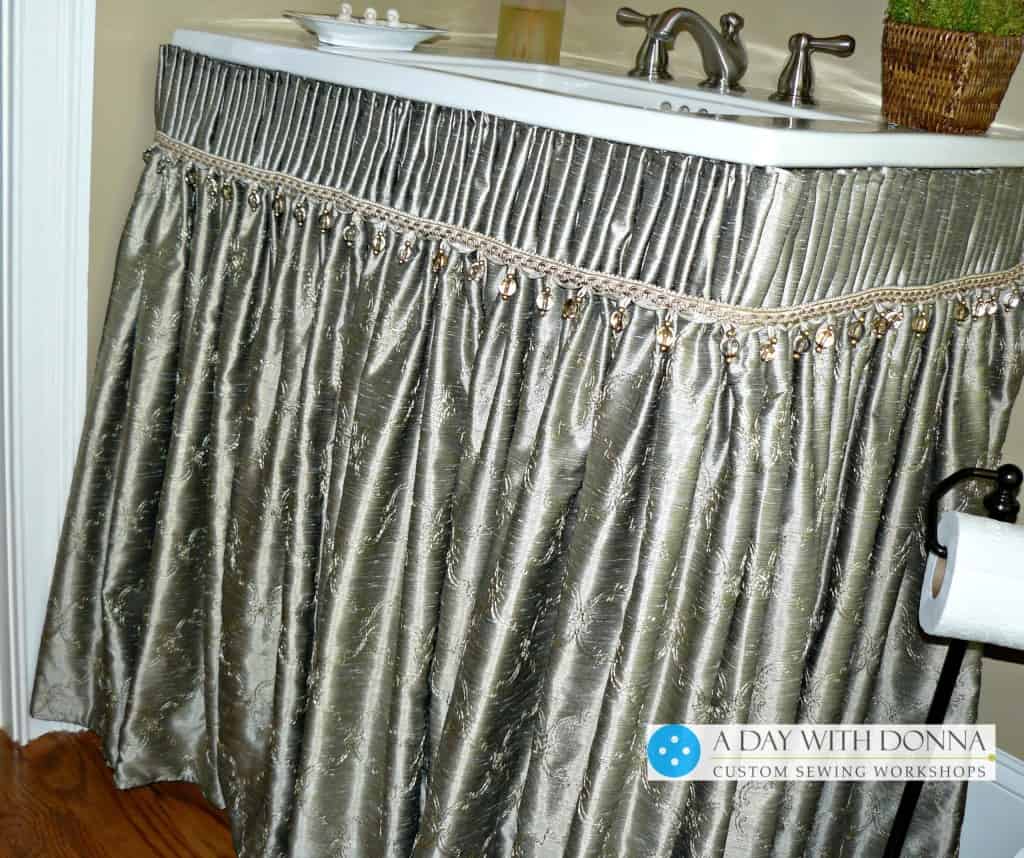
This powder room has a new pedestal sink skirt. Isn’t it pretty?
A pedestal sink skirt was made for a pedestal sink in a client’s powder room. Not only is this skirt beautiful, it is functional as well as it adds storage underneath the skirt. The challenge for me was figuring out how to adhere the pedestal sink skirt to the pedestal sink itself. Simply adding Velcro to the sink and the other half of the Velcro to the pedestal sink skirt seemed the logical thing to do.
However, from past experience I know the sticky backing on Velcro doesn’t last forever. I decided to build a frame from lumber from my local building supply store and add Velcro to the frame. The pencil pleat tape I used to gather the pedestal sink skirt had hook to marry to the Velcro used on the frame.
Do you have a powder room with a pedestal sink? If so you may realize with a pedestal sink storage is a difficult thing to attain, right? Maybe you have tried to add a skirt to your vanity sink by attaching sticky Velcro to the sink. Eventually the Velcro releases and is no longer sticky anymore, right? And then the skirt begins to fall off and usually right before company comes!
I’d like to show you how using a few pieces of lumber from Home Depot or Lowes, or other lumber supplier you can create pedestal framework to attach your skirt to.
Here is a side view of the pedestal sink. You can see the sink has a lip above the bowl portion of the sink. This lip gives the perfect place for a wood frame to slide under.
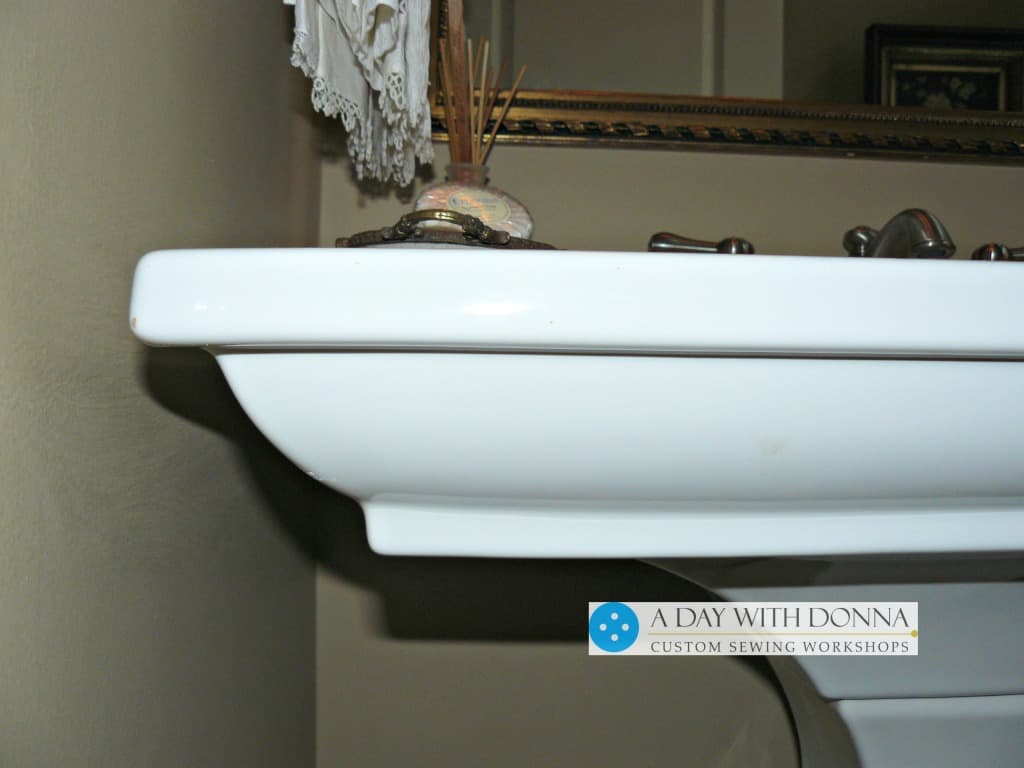
The side view of the pedestal sink shows you the lip of the sink.
Make sure you measure the width of the front of the sink, from the front of the sink to the wall, from under the lip of the sink to the floor, and notate where the floor molding is. Build a frame that looks something like the photo below.

Make a frame from lumber to fit under the lip of the sink. Attach Velcro hook along the sides and front of the frame. This will hold your skirt to the frame.
Cut the legs to your pedestal sink skirt frame short enough to clear the sink bowl as I have shown you in this photo. You may drill pilot holes in the wood and then add screws to build the frame.
This picture shows you the pedestal framework from the inside. Be sure to cut the legs for your pedestal sink frame low enough to be able to slide under the sink. You know the saying, measure twice, cut once? Proper measurements will allow for a perfect fit of your frame.
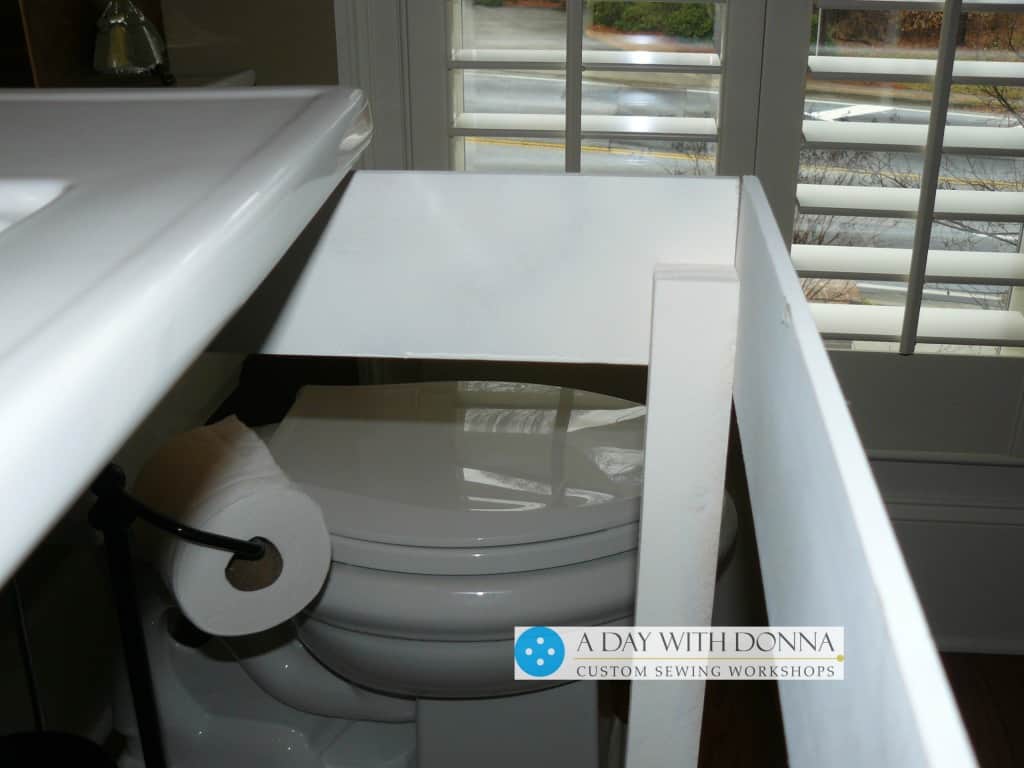
Notice how the back legs are not flush with the back of the pedestal sink skirt frame. This allows the legs of your frame to clear the floor molding. You do not have to attach the frame to the wall. I like the fact that if needed the frame can simply slide out from under the pedestal sink.
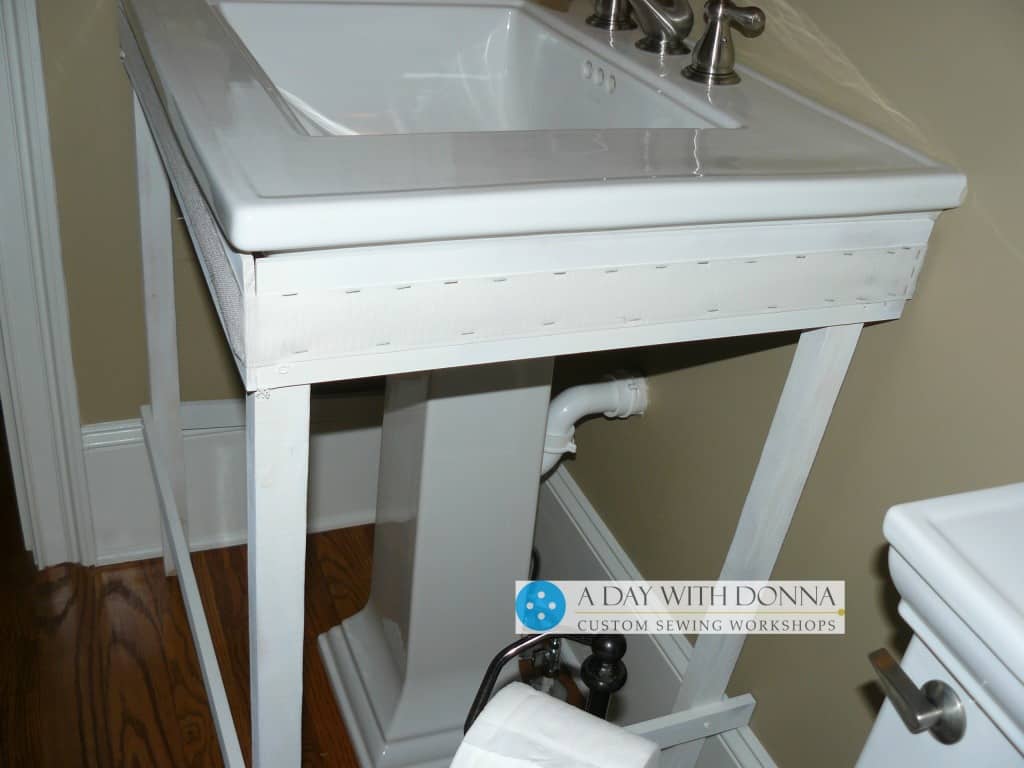
You will want the back legs of your pedestal sink framework to clear any floor molding. The legs are not flush with the wall, but flush with the floor mold.
The Velcro is stapled to the front and sides of the frame slightly below the top. You want the Velcro to be placed on the frame to match up were you have placed the other side of the Velcro on your pedestal sink skirt.
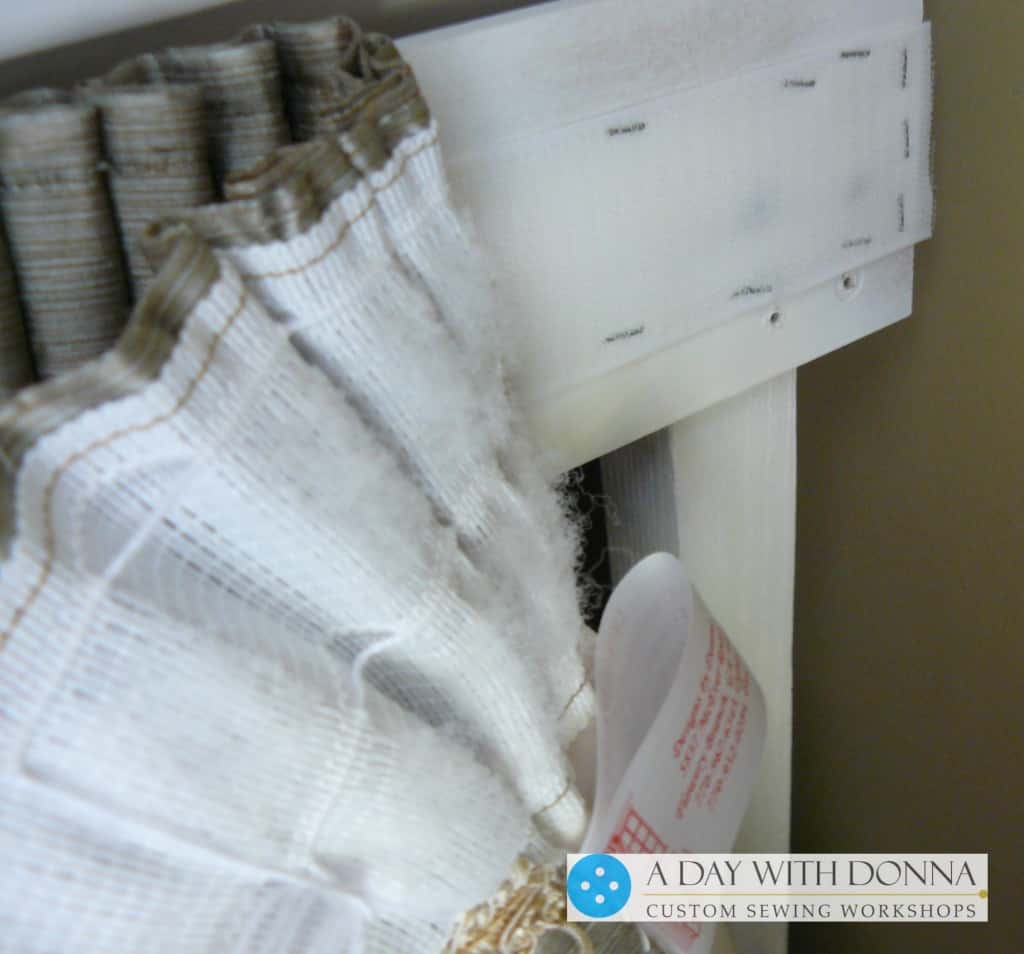
This picture shows you the hook portion of the Velcro stapled to the frame and the back side of the skirt with the pencil pleat shirring loop tape.
Once the pedestal sink skirt is attached to the frame, adjust the pencil pleats to be even at the top. The pleats on the skirt should rest just below the lip on the pedestal sink.
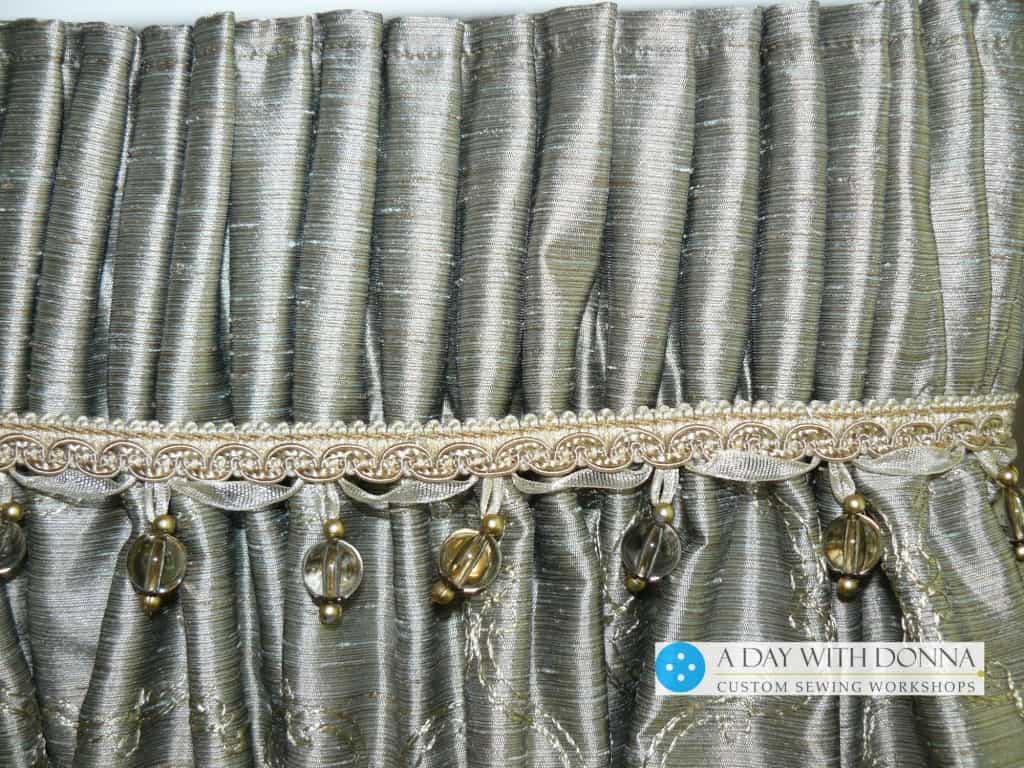
This photo shows you the beautiful pencil pleats created by the pencil pleat shirring tape. Do you love this look?
Learn more about Custom Sewing Workshops and A Day With Donna on my website www.designsbydonnaatlanta.com .
How do you like this look? Have you added a pedestal sink skirt to a sink in your home using a different method? Will you share in the comment box below? I’d love to hear from you!