")
I cut up my son’s high school letterman jacket and turned it into an upholstered chair.
Chair Seats,Design,Designs by Donna Products,How To,Inspiring Custom Homegoods,Interior Decor,Interior Design,Just For Fun,Uncategorized,Upholstery,Workshops
If you have grown children, you know they leave some [...]
If you have grown children, you know they leave some things behind when they move into their new places, right? Trophies, books, papers, and clothing like letterman jackets. Sound familiar? I bet it does! And what do you do with all this stuff?
Here’s what I did with our son, Justin’s Cross Country High School letter jacket. I took a small chair hands-on upholstery workshop, led by Kim Chagnon of Kim’s Upholstery. And since I hosted the workshop right here at Designs by Donna, I didn’t have to go too far to take the workshop.
First came the letterman jacket. Next came this funky little chair. I found the chair at an antique market in Flowery Branch. It wasn’t in great shape, but I had vision. Can you see it too? I really liked the arms and the carving at the legs.
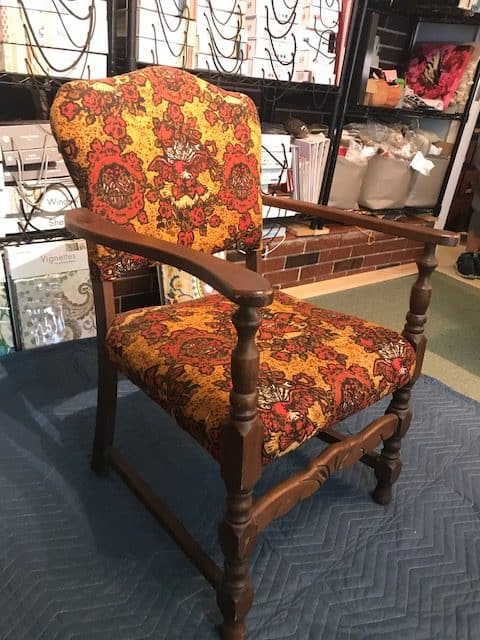
This simple chair became the subject for the upholstery workshop.
In order to prepare for the workshop, the chair had to be stripped. God bless my friend, Tracy Windley, who took the time to strip it for me! The chair had to be stripped down to nothing but the frame and the springs. And then I roughed up the finish of the chair with a piece of steel wool as I wanted it to look old and weathered. After that, I put a coat of Old English Wood Conditioner on the chair.
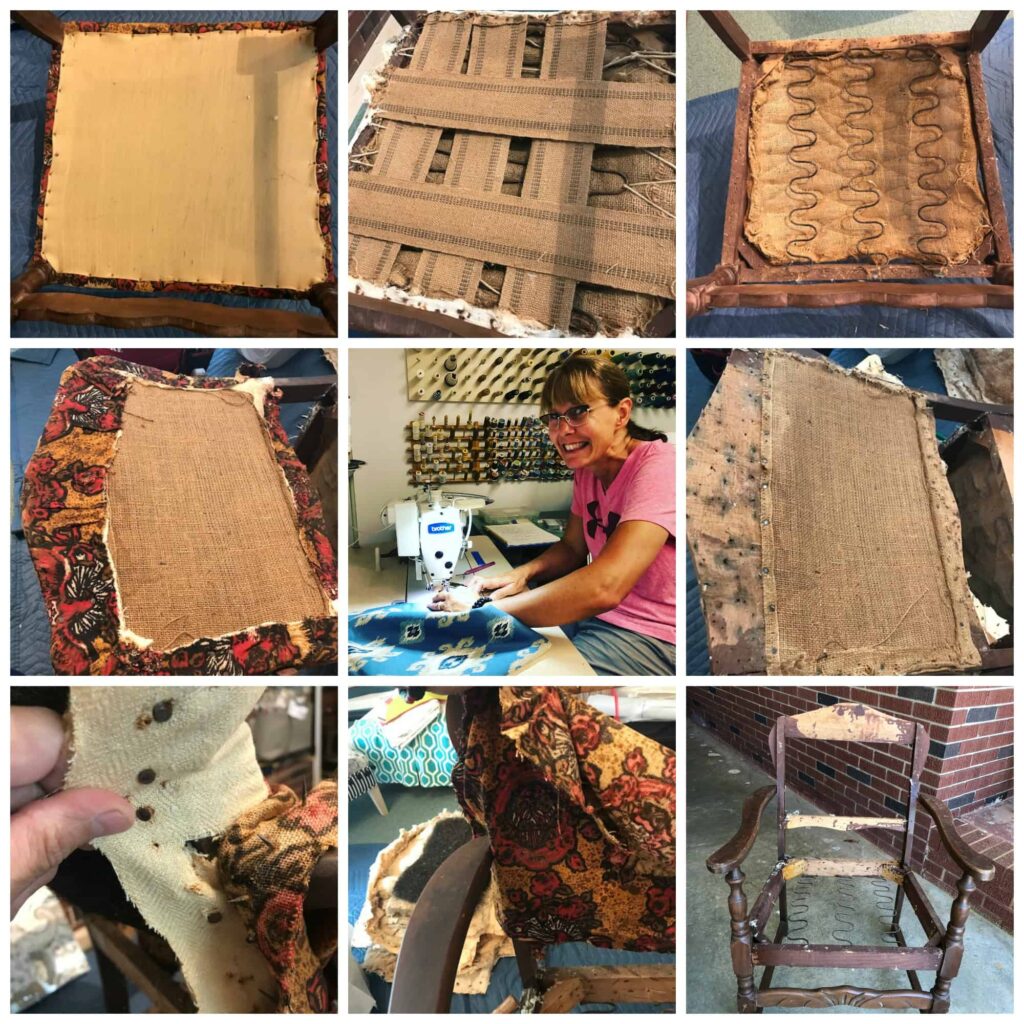
Here is Tracy in the middle of all the chair photos. She removed all the nails, staples, fabric, horsehair, cotton, and burlap, leaving just the chair frame and the springs. Thanks again, Tracy. I owe you!
On the first day of the workshop, I learned to tie a new knot to secure the springs. Then I added upholstery strapping. And then it was time to prepare the seat. I wanted a nicer crown on the seat than the original chair so I added an extra layer of foam covered with a layer of Dacron. And then I did the same thing to the inside back. I was already proud of how the funky little chair was turning out!
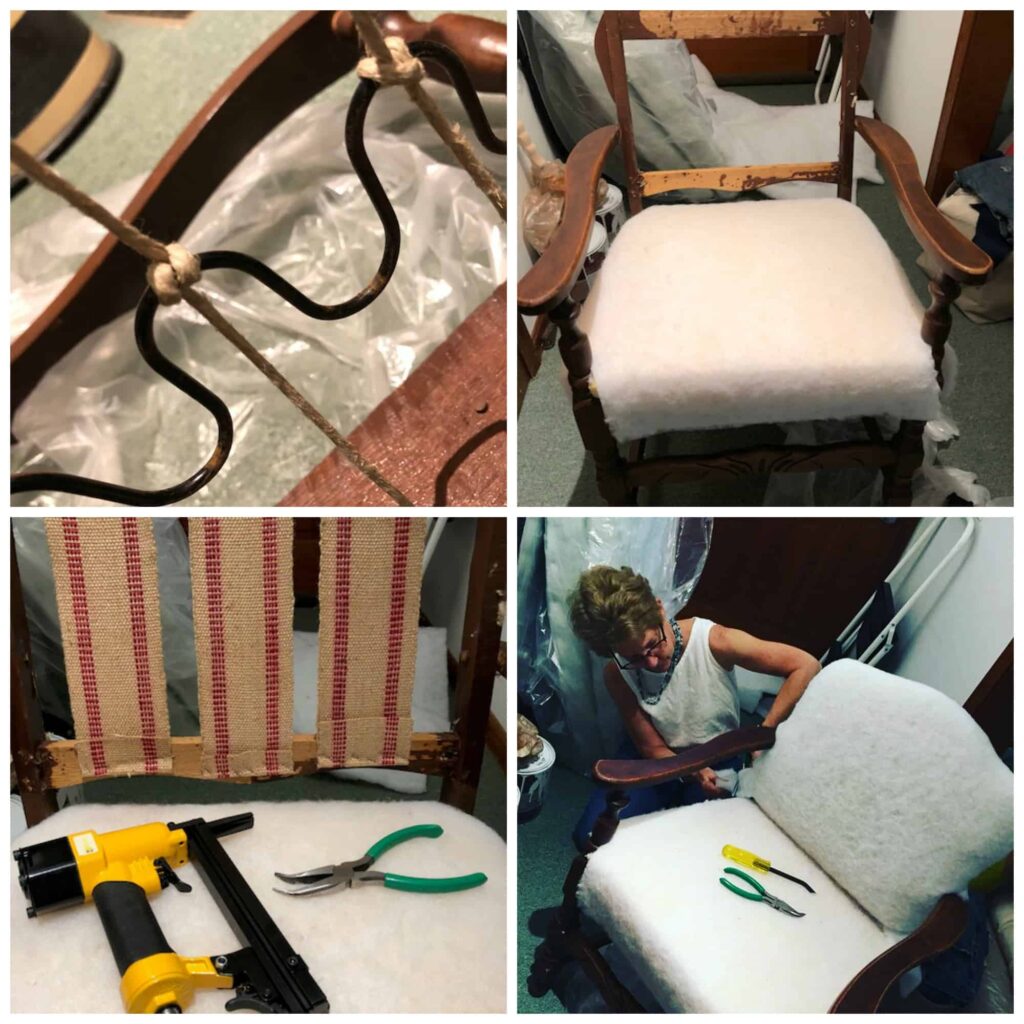
A new knot, create a crown for the seat, upholstery webbing, staple, pull out staples. Learning a new skill so I can stay young!
Once I had the chair ‘insides’ ready, I was ready to cut the letterman jacket apart and make it into fabric for the chair. This was scary and took real concentration and thought in order to complete my vision. And honestly, the vision came little by little as I worked on the chair.
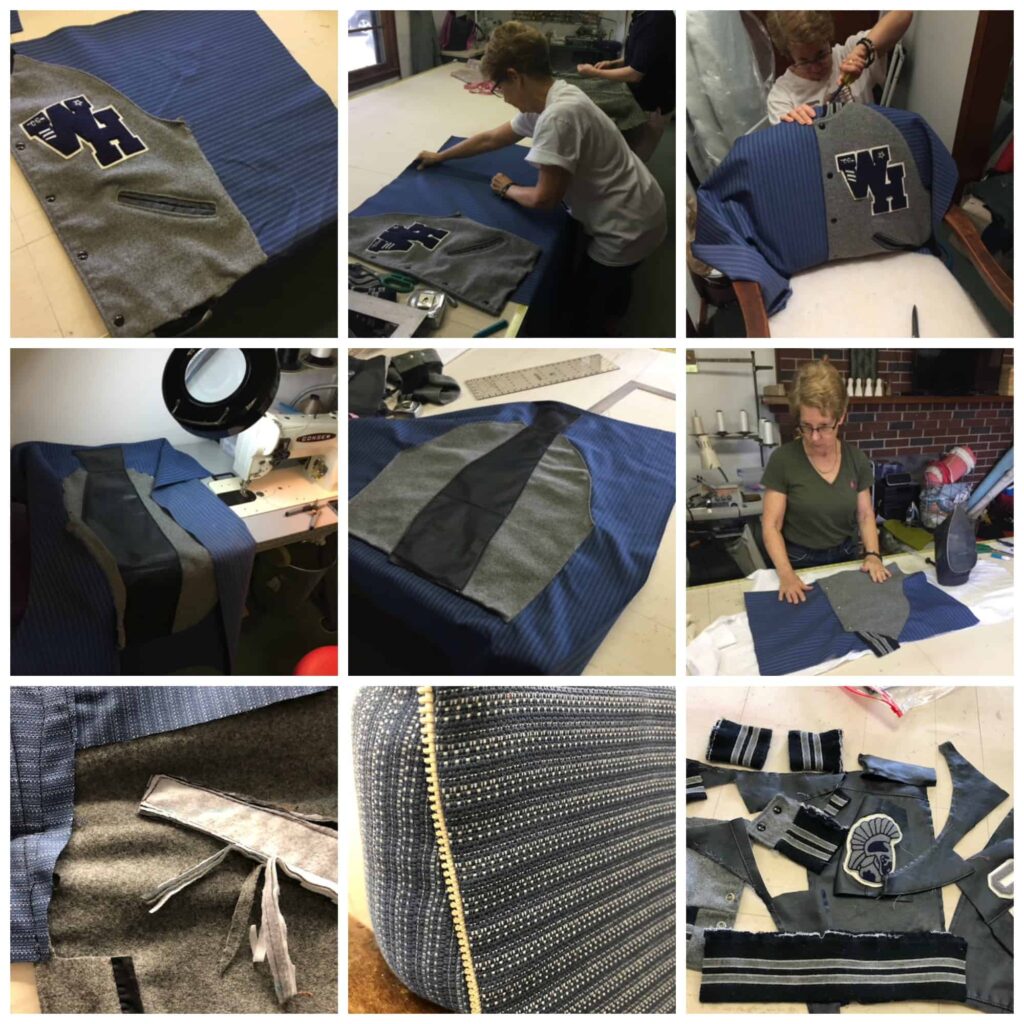
Cut a little, add a little contrasting fabric, sew a little, staple a little, repeat. Oh, and of course, I had to add some of my zipper detail.
By the end of the third day, the little chair came together and all the details worked out wonderfully. Because I was using a letterman jacket and having to create the fabric as I went along, the process for this simple chair took longer than had I been using ‘regular’ fabric. But thinking outside of the box is my style and I’m glad I followed my gut!
Thanks, Kim Chagnon of Kim’s Upholstery for leading this fun and fast paced hands-on workshop. I’m looking forward to the next small chair workshop in 2019! Yes, she’s coming back next year. Let me know if you’d like to join us. Kim’s workshops always sellout so you’ll want to be sure to sign up early. Sign up for my newsletter if you aren’t already so you can find out as soon as the dates are announced. Click here to sign up for my newsletter.
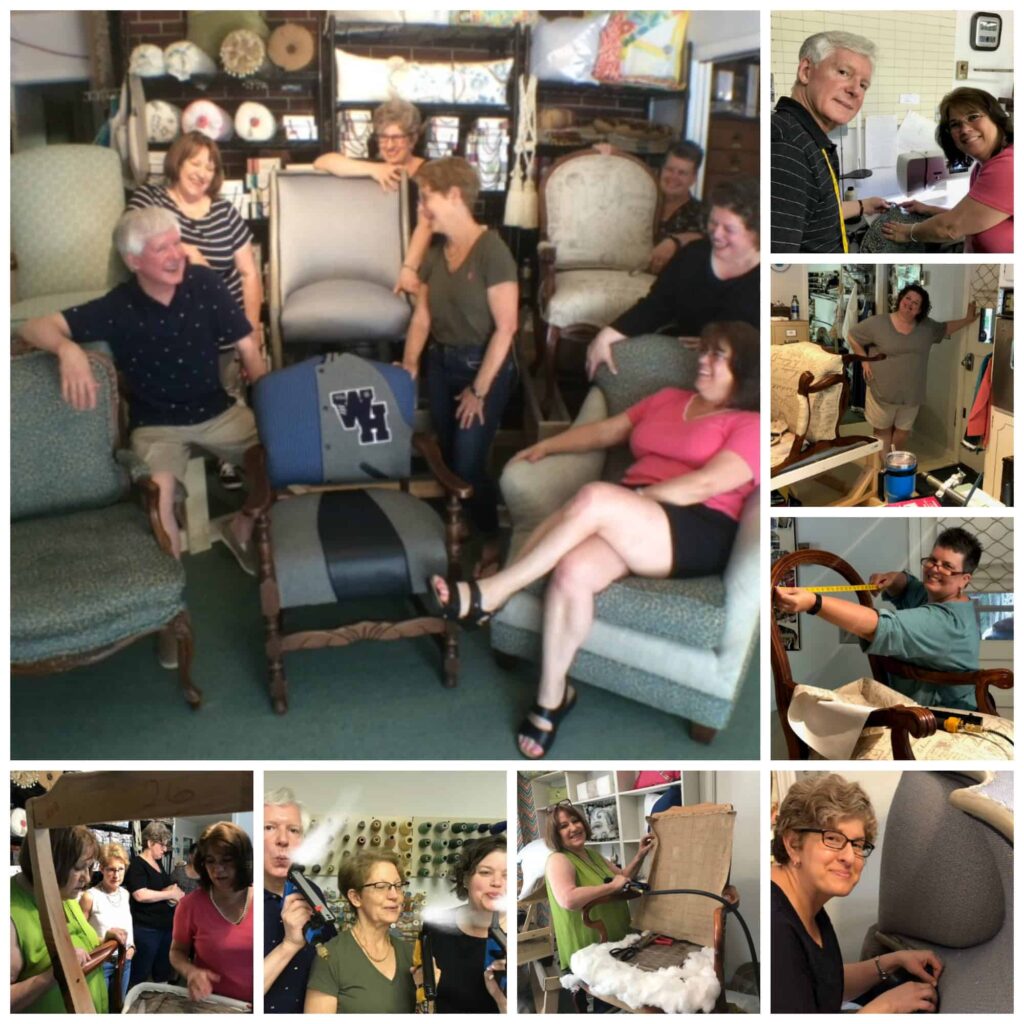
Happy memories, new friendships, and new chairs for all who attended the small chair upholstery workshop.
I made this for our son, Justin. He’s seen pictures and likes them. However, I’m looking forward to him seeing it in person and taking it home with him.
What do you think of my creation? Do you like it? Do you have a letteran jacket you’d like me to use to create a one of a kind chair for you or a man in your life? Contact me for more information. I’d love to help you with this!
If you know of someone who would like to read this post, please share. Thank you and God bless!
Share this article

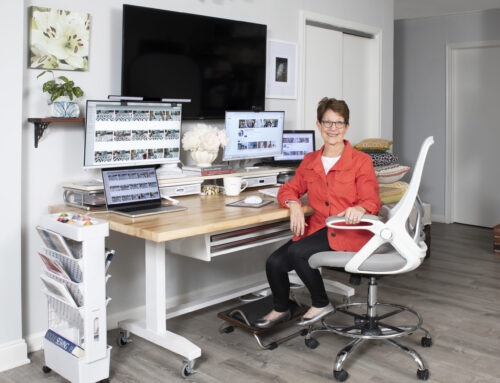
Written by : Donna Cash
I’m an award winning custom soft furnishings designer, sewing fabricator, and teacher of exquisite custom fabric items, also known as custom soft furnishings, for homeowners and interior designers. These products range from custom pillows and valances to draperies, slipcovers, and upholstery. Sewing has always been my creative outlet. Designs by Donna has been serving Atlanta and the surrounding areas since 1987. We are located in Flowery Branch, just outside of Atlanta, GA.