Learning to upholster a chair through the eyes of a drapery gal
Designs by Donna Products,How To,Inspiring Custom Homegoods,Interior Decor,Just For Fun,Sewing,Step-by-Step,Uncategorized,Upholstery,Workroom Tips,Workshops
A drapery gal’s perspective on learning upholstery. Learning to upholster [...]

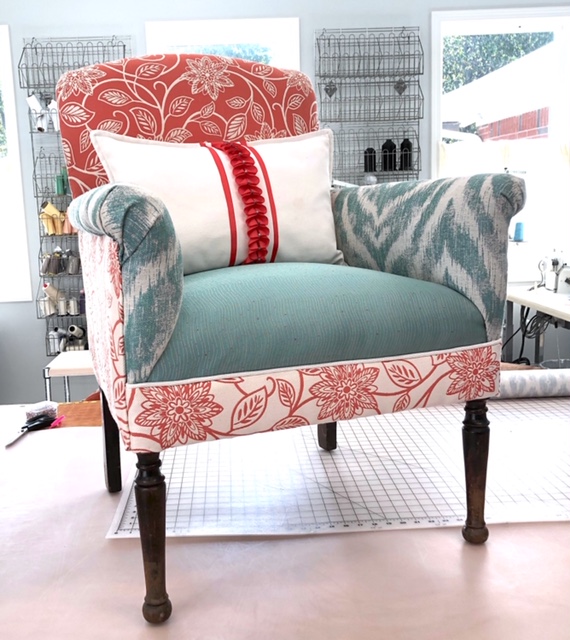
Plaid chair no more! Now it’s fun and happy with new colors, patterns, and textures.
A drapery gal’s perspective on learning upholstery.
Learning to upholster furniture is a totally different skillset than drapery making. For one thing, you don’t have to strip naked before making draperies. My friend, Kim Chagnon of Kim’s Upholstery, teaches the type of upholstering where you remove everything covering the frame. Everything. Not just the fabric. Everything. All the padding, all the foam if there is foam, all the strapping, all the springs. Everything. She teaches you to start with a bare naked furniture frame.

Removing all fabric, staples, padding, foam, all the way down to the bare furniture frame. The chair in this photo still needs the springs to be removed. Then it’ll be naked, all the way!
Preparing the chair before the workshop.
The workshop didn’t start on day one. Many hours were put into stripping the chair.
That in and of itself takes a long time to do. I threw all the stuffing away but kept the fabric pieces as a reference should I have needed them when putting the new fabric on the chair. Oh, and did I mention stripping is a dirty process? Yuck! I was constantly sweeping and vacuuming all the particles and stuff coming out as I was removing all the old coverings. If Kim had not been coming to my workroom to lead the workshop, I may have called it quits and gone back to making draperies! I don’t mind getting my hands dirty or anything, I just prefer to start with new fabric and make draperies.
While I was in the stripping process, I hopped over to Kim’s Upholstery membership site and watched some of the videos to help prepare myself and learn about upholstery tools, techniques, and terminology. I didn’t want to look like a total newbie when the workshop began. And I’m so glad I did! I realized I had a few of the tools necessary for the upholstery process. I can still use a few more but I had the bare basics.

A true upholsterer would laugh at this drapery gal’s collection of upholstery tools, but at least I have a few, right? You should see all the drapery making tools I have!
Day One of Upholstery Workshop
Once the chair was naked the process of reupholstery begins. What came off last goes on first. So in my case, the upholstery webbing was added to the bottom of the chair. This wasn’t too bad. I learned to use a webbing stretcher which I had actually used to stretch the canvas on to my drapery work tables. Now I know how to use it for upholstery. 🙂
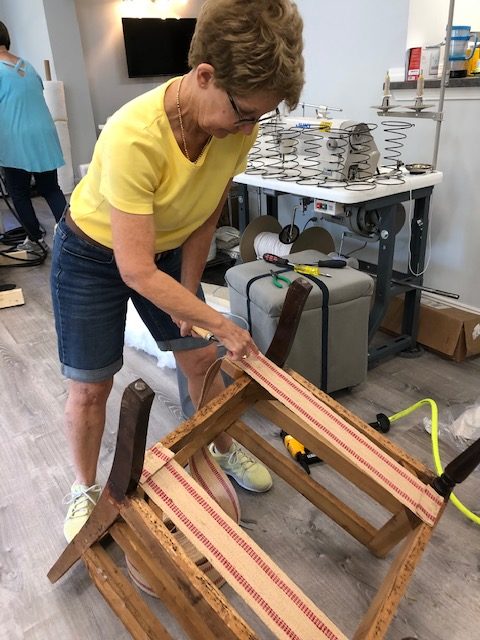
Here, I’m learning to use an upholstery stretcher to add the jute webbing. The webbing is stretched across the bottom of the chair and when woven from side to side.
Learning to tie springs.
Next, came sewing the springs to the jute webbing that had just been stretched to the bottom of the chair. I’ll have to say, this seemed really scary to me until I listened and watched Kim demonstrate how to do this. I did it and actually liked the process! It doesn’t look all that pretty from the bottom, but nobody is going to see it because it’ll be completely covered up in the end.

First, the bottoms of the springs are sewn to the jute webbing. Next, they are tied together at the top of the springs to keep the springs together and to create a comfortable seat to sit on.
The bottoms of the springs are attached but the tops of the springs are all loose and wiggly so it’s time to tie these together. The old chair had 4-way ties. This is okay but 8-way tying is much better. Each spring ends up with 8 knots when you’re finished. The springs are tied from side to side, front to back, and diagonally across the springs. This creates a seat that is soft, supportive, and comfortable. This also makes the piece of furniture longer lasting. With all the work going into this project, I wanted to be sure it would last a long while! I’m totally happy I took the time to learn to 8-way hand-tie the springs.

You can see the difference between 4-way tied and 8-way tied. Doesn’t an 8-way hand-tied look more secure? And it’ll hold up better than 4-way tied too.
And now that the springs are all tied and pretty, it’s time to cover them with burlap and then add the edge roll to the front of the seat. Next comes padding using several layers of upholstery cotton, and then fabric. Finally, fabric! Tomorrow though!
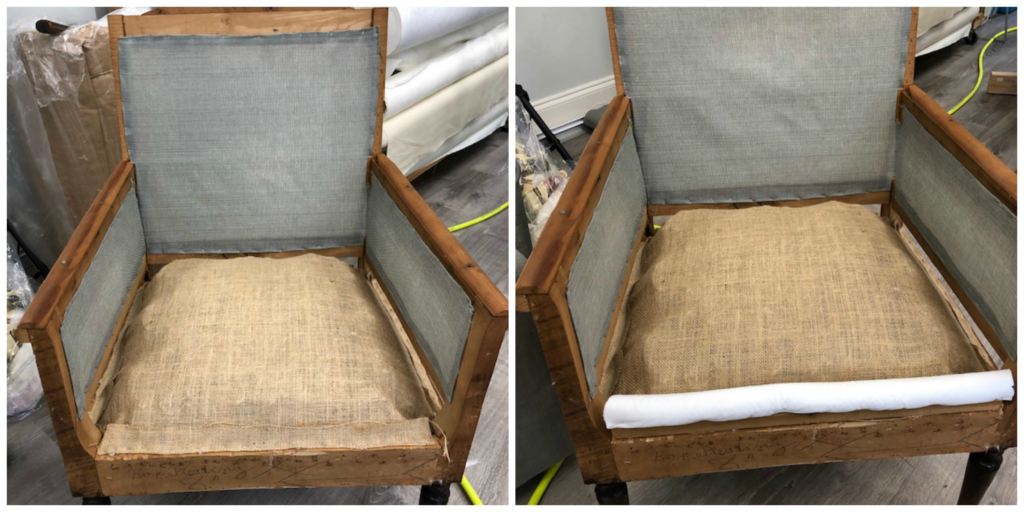
Burlap covers the springs and edge roll is added to the front of the chair frame for comfort.
Day Two of Upholstery Workshop
Working on the seat.
With the fabrics planned (well almost), the chair seat fabric went on first after placing several layers of upholstery cotton over the springs and burlap. The fabric had to be clipped to go around the wooden posts at the arm fronts and back. These were critical for the fabric to lay nice and smooth. Too little of a cut and there would be a wrinkle in the fabric. Too much of a cut and you’d have to start over with a new piece of fabric. So just the right cut is necessary. Kim was a big help in showing me exactly how this was to be done.

After adding upholstery cotton it’s time to add the fabric and cover the seat.
The inside arms.
Next, I moved on to the inside arms. Lots of upholstery cotton, next Dacron padding, and then the fabric. More correctly placed fabric relief cuts for the fabric to lay smooth. Lots of staples and pulling of the fabric. I stand back to admire the chair and decide I’m liking everything so far. After adding cotton to the inside back, it’s time to call it another day.

After more cotton on the inside arms, the fabric goes on and then more cotton for the inside back.
This pretty much sums up the second day of the workshop for me which was good because I didn’t think I was totally in love with the fabric I had selected for the inside back. I had time to mull this over in my mind before class began the next morning.

Not loving the original fabric for the inside back and I think I’m liking a pop of color.
Day Three of Upholstery Workshop
The inside back.
With my new fabric plan in place, the inside back was padded with several layers of upholstery cotton and then Dacron. And then the fabric. How do you like the pop of coral with white floral design? I’m liking it. Carefully the fabric is stapled to the top back of the chair, and pulled down through the back of the seat and stapled to the back of the chair near the bottom. The cutting and snipping placement is critical for the fabric to lay smoothly. Thanks to Kim’s Upholstery membership site videos, I saw how she does this. However, with her leadership in the workshop, she helped this drapery gal see where exactly they needed to be cut and clipped so I didn’t have to have any re-do’s. Yay!
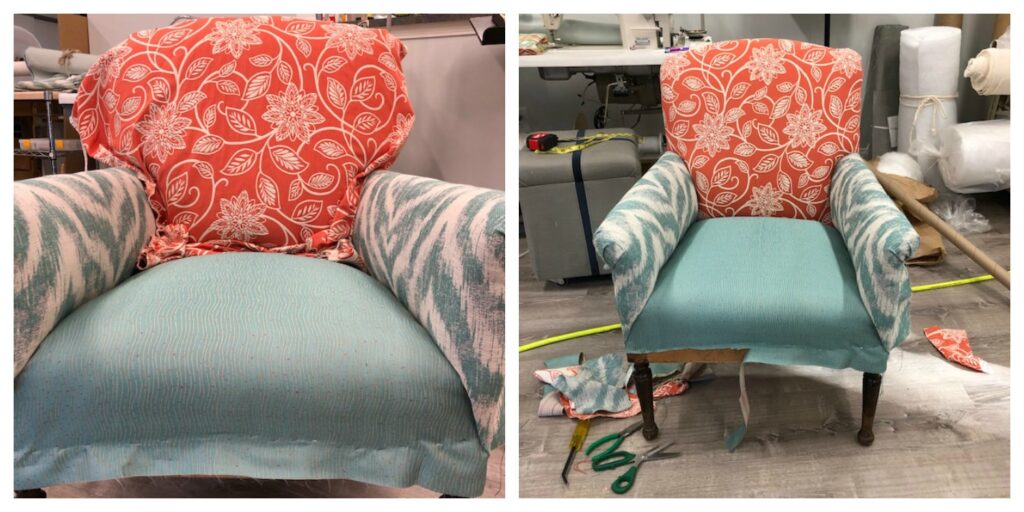
After more layers of cotton and Dacron, the inside back fabric is added. I’m loving the color and fabric patterns together.
Proper pattern placement.
Next was the front boxing area. I had to carefully plan the cuts for the outside back, outside arms, and the boxing cuts to coordinate all together so the fabric pattern would flow between each of these areas. This is what makes a piece of furniture look beautiful. If you’ve ever seen a piece of furniture with a design in the fabric and things looked a little off, it’s probably because the fabric wasn’t flow matched. There is a difference. Being a fabric artisan is working with the beauty of the fabric, not just cutting the fabric and applying it to the furniture. We use this in soft furnishing designs as well.

Before adding the boxing fabric, the pattern is checked to be sure it flows between the boxing, outside arms, and the back.
With the careful pattern placement planned out, the front boxing, the outside arms, and finally the outside back were applied. More muslin. More Dacron. Whew! I used something called curve ease on the outside back which holds the raw edges of the fabric in place. Using this the correct way is critical because you can’t cut your fabric too big or too small, but it must be cut just right! And Kim showed me exactly the correct way to do this.

Applying the boxing, outside arms, and outside back to almost finish the chair.
Almost finished!
I haven’t covered the very bottom of the chair with cambric yet because I’m still deciding if I want to use a welt cord along the bottom. I’m looking for a small cottony bullion fringe. Something fun. So until then, I’ll just admire my chair and remember the fun times and memories from the small chair upholstery workshop.
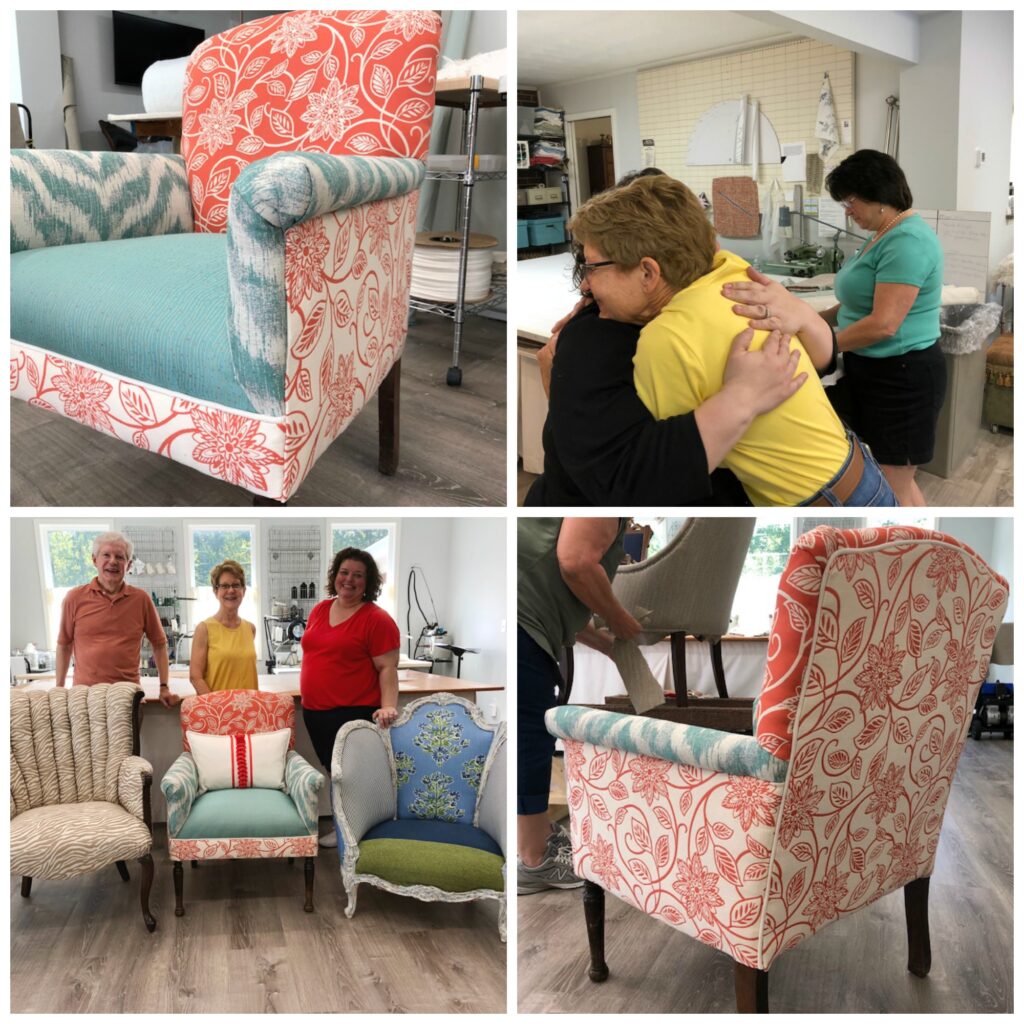
Fun times and happy memories are always part of the experience when taking a hands on workshop.
Share this article

Written by : Donna Cash
I’m an award winning custom soft furnishings designer, sewing fabricator, and teacher of exquisite custom fabric items, also known as custom soft furnishings, for homeowners and interior designers. These products range from custom pillows and valances to draperies, slipcovers, and upholstery. Sewing has always been my creative outlet. Designs by Donna has been serving Atlanta and the surrounding areas since 1987. We are located in Flowery Branch, just outside of Atlanta, GA.

