Patchwork chair seats – the challenges, fun, & following my gut.
Chair Seats,Design,Designs by Donna Products,Embellishments,Inspiring Custom Homegoods,Tips and Tools Tuesdays,Uncategorized
Patchwork chair seats and following your gut. You may be [...]
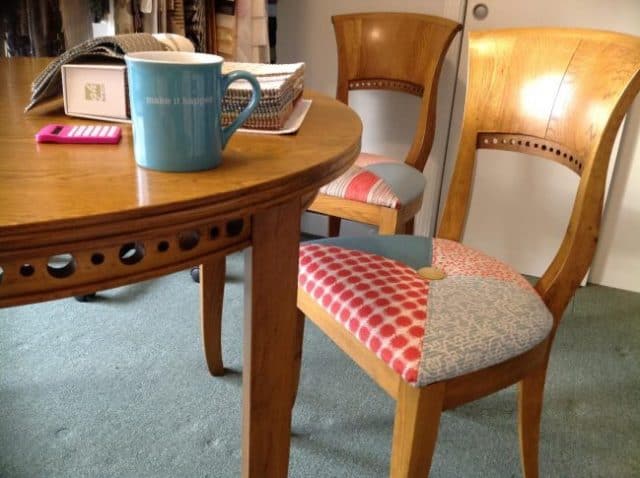
Patchwork chair seats and following your gut. You may be wondering how these can possibly be related. Well, really, they aren’t. Except that because I followed my gut I created these one of a kind chair seats for the sample room here at Designs by Donna. And I really like them much better than my original plan.
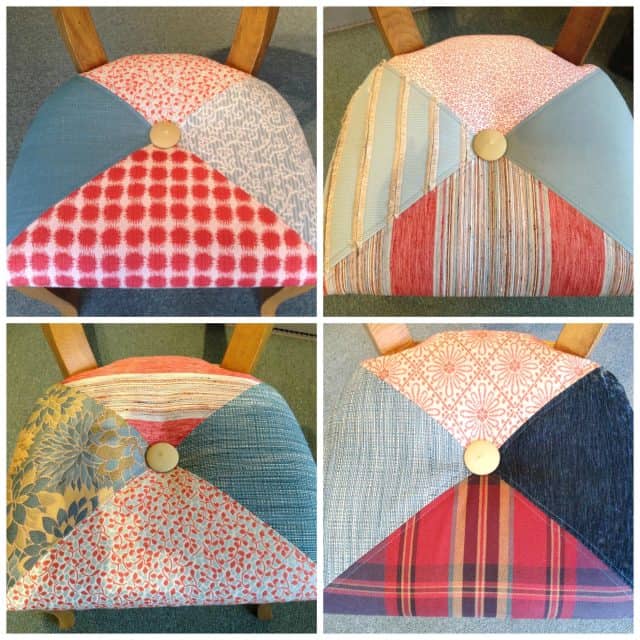
Four chair seats with fourteen fabrics and one common element, the button detail.
Once I decided to recover these chairs, I had a vision. And it wasn’t anything like the chairs you see here. I was going to do something very classic and I know I would have loved them. But the original vision wasn’t what my sample room really needed. So I followed my gut and tried something different. My gut was telling me to find four fabrics, all with coordinating colors and interesting textures. I was envisioning patchwork seats. I wasn’t sure how I wanted these to be joined so I drew lines on a chair seat before removing the fabric.
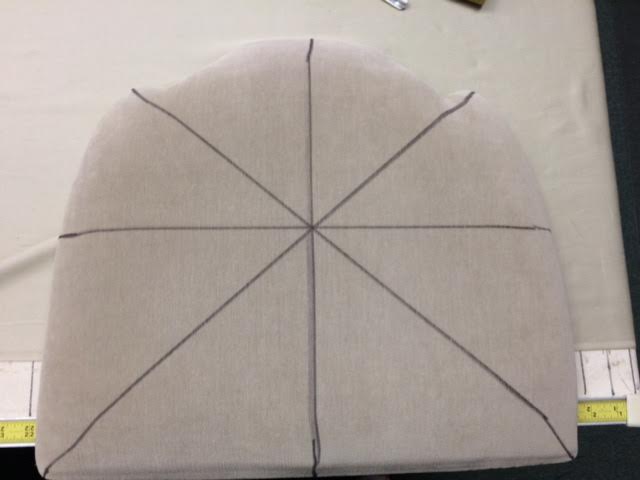
Chair seat marked into sections in order to make a pattern
This blog post isn’t about how to recover a chair seat. Instead, I’m going to tell you how I chose fourteen different fabrics and my thought process for how to arrange the fabrics. And I’ll tell you the one common piece of each of my puzzles I used to tie all four chairs together. I’ll also share with you a few challenges of working with fabrics with bias edges and how to deal with these, why I chose to top stitch the seams, and how I pulled the button through the center.
If you want to learn how to recover a chair seat, you can visit: http://kimsupholstery.com/online-classes/membership-benefits/
First on the agenda was selecting fabrics. Each piece wasn’t very large, so even remnants worked. Most of the fabrics came from something I had left over from a project I made for our home, or fabrics I purchased to use some day! The fabrics are all in the spa/teal blue family and the coral/salmon family. Cool colors and warm colors. See how the teals and salmons relate on the color wheel? They are directly across from each other and look great together.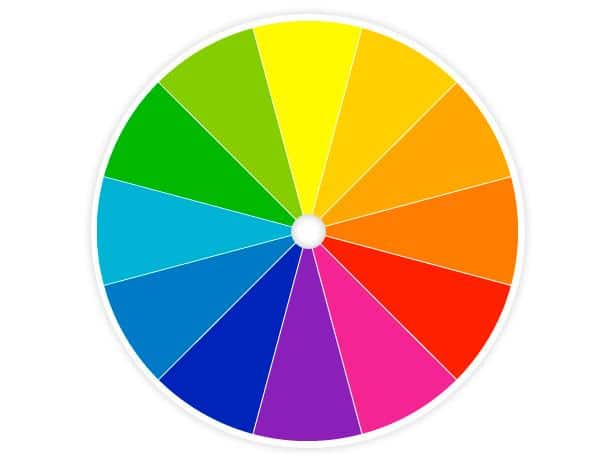
To keep some uniformity of all these fabrics, I decided to place the spa/teal color fabrics on the sides of the chair seats, and the coral/salmon color fabrics on the front and backs of the seats. This helps make the fabrics look planned and less random.
Each of the seams to be stitched together were on the bias. It’s a good idea to use an iron on fabric stabilizer on the back of the fabric. Stabilizing the fabric helps to keep the bias seams from stretching. Here’s a picture of the first patchwork piece I made. It’s ugly, but don’t worry. There’s extra fabric around the outside edge of each piece in order to have enough fabric to pull as I stapled to the bottom of the seat. It’s hard to see here but I topstitched the seams, which is usually a no no in custom fabrication. However, I followed my gut. I like to think outside the box and I love the way top stitching can become a design element, so that’s what I did.
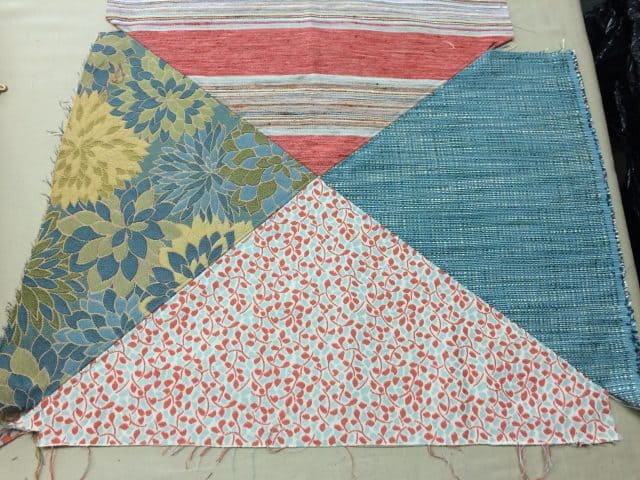
Fabrics are stitched together and topsitched.
As you can see the piece has no “bias bubble” in the center. This is due to using the fabric stabilizer and taking my time to sew slowly and not stretch the bias edges.
Once my first piece was complete, I played around with my other fabric combinations to find just the right combination of four fabrics. I used one fabric from the original piece in each of the remaining chair seats, I just used it in another position on the seat itself. The stripe was horizontal on the first patchwork piece and the second time I used it, the stripes were vertical.
Once the patchwork covers were completed, I knew they needed one more thing. The center of the chairs were screaming for buttons. And you know how I love buttons!
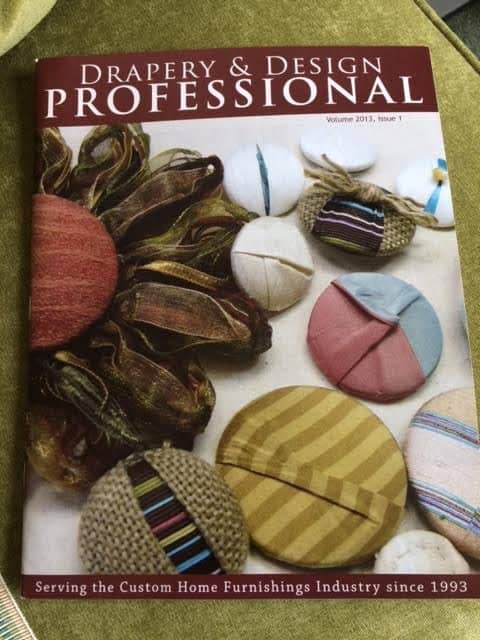
My buttons were on the Drapery & Design Professional magazine cover in 2013.
I found a stash of fabric covered buttons which blended with, but didn’t exactly match, my chair fabrics. This is the one common thing among each of the patchwork seats. I drilled a hole in the bottom of the chair seat, threaded button twine through the button shank and the eye of a large needle and pulled through the bottom of the chair seat. The eye of the needle was large and my stitching on my chair seats was small so I needed we had to use pliers to get the needle through the fabric.

Pull a button through the center of the four pieces of fabric.
Covering these four chairs took longer than if I had chosen to use a single piece of fabric. And I would have loved the original design from the vision I started with, but I’m really glad I went with my gut. I’m very pleased with the outcome.

Chair seats with fun fabric patterns and colors
So listen to your gut, it could be telling you something. Maybe you need a little more color in your life? I hope you’ll share with me.
You can watch the video I made for my Tips and Tools Tuesdays on following your gut and see these chairs in my sample room by clicking below:
Oh, and what do you think of the chairs. Like? Hate? Post in the comments below.
If you or anyone you know needs custom window treatments, bedding, pillows or light upholstery, please let me know. Or reach out to me here: donna@designsbydonnaatlanta.com
Share this article

Written by : Donna Cash
I’m an award winning custom soft furnishings designer, sewing fabricator, and teacher of exquisite custom fabric items, also known as custom soft furnishings, for homeowners and interior designers. These products range from custom pillows and valances to draperies, slipcovers, and upholstery. Sewing has always been my creative outlet. Designs by Donna has been serving Atlanta and the surrounding areas since 1987. We are located in Flowery Branch, just outside of Atlanta, GA.

